
30 June 2006
runo

a fabric covered photo/postcard board
MATERIALS: homasote board, fabric at least three inches longer and wider than the board, clear beading elastic, pushpins, thick rubber bands
TOOLS: a ruler and a staple gun
HOW: hgtv.com has a good tutorial under the heading "memory board". I did not use quilt batting like they do because I didn't want the board to be poochy, but batting would improve the holding power of the elastic.
NOTES: The fabric covering this board is a 1995 design called "Runo" by Kristina Isola for Marimekko. (The Crate & Barrel Outlet in Chicago carries discontinued Marimekko fabrics at $8.95/yd the last time I checked). I didn't want the strings that hold the cards and photos to obscure the pattern, so I looked for purple elastic everywhere and then happened on clear elastic for beading at Target. The pewter pushpins hold the elastic bands in place where they intersect. It's best to have a helper when making this board because holding the fabric and then the elastic taut for stapling is just not a one woman job. I also recommend using small lengths of thick (broccoli stem holding) rubberband under the elastic where you staple it to give the staples a better grip.
29 June 2006
grape
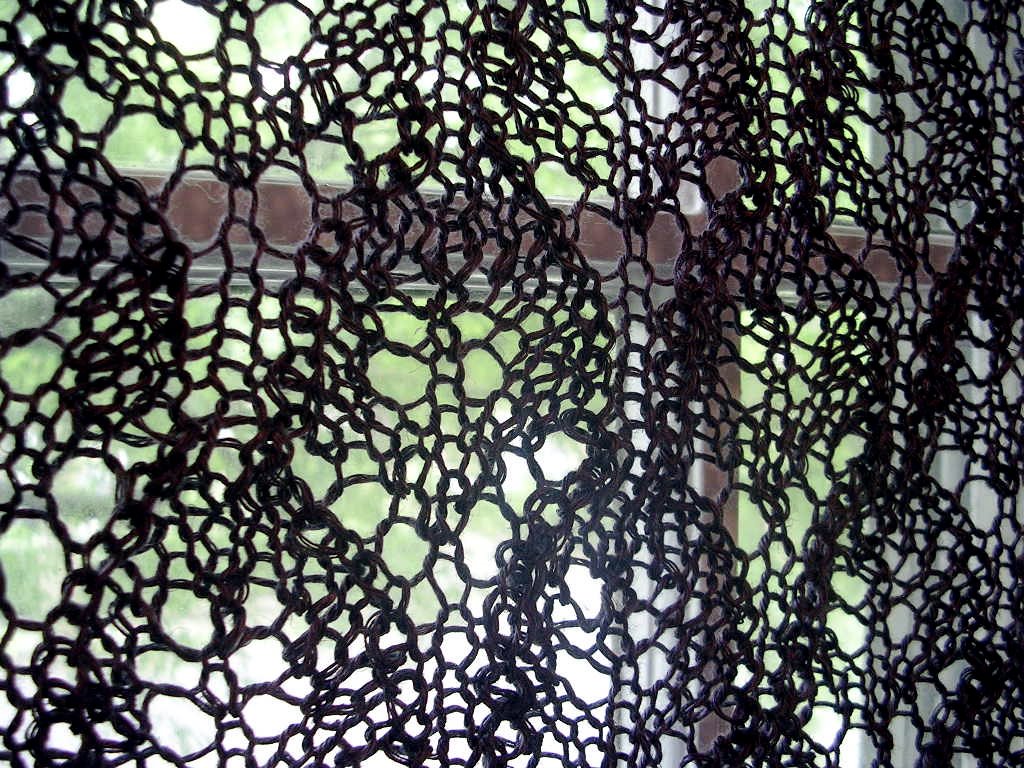
a knitted kitchen curtain
MATERIALS: two hanks of Louet Euroflax Sportweight in Grape for a 24x27" panel
NEEDLES: size US6
PATTERN: The Kimono Shawl from Cheryl Oberle's book Folk Shawls
28 June 2006
rosie
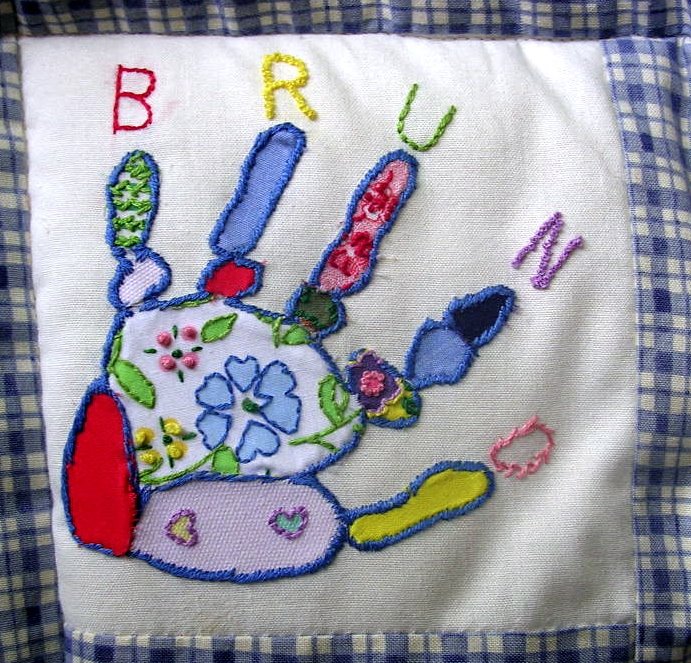
a quilt patch
We have a family tradition of welcoming new babies with a quilt made out of handworked patches. My niece Rosie made this patch for my son Bruno's quilt by having her son Charlie leave a handprint on the fabric that she overlayed with appliqued pieces of her old dresses and embellished with embroidery stitches. This item is the first in a series I'll call Gifted Wednesdays that features the handwork of friends and family.
27 June 2006
bluelio
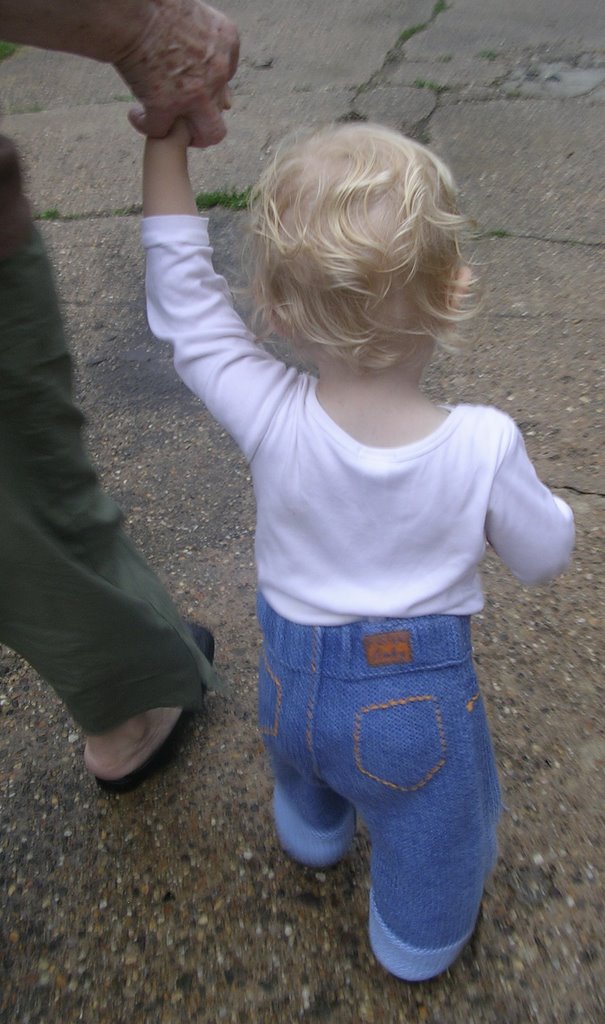
knitted baby jeans
PATTERN: "Blu" designed by Kay Gardiner and me and published in the Winter '05 knitty.com
NOTES: This prototype 12M pair is still going strong though Elio wore them through six months of crawling (even on concrete). These days I stretch the legs down and let them dry flat instead of machine-drying so that they aren't too short.
26 June 2006
basket
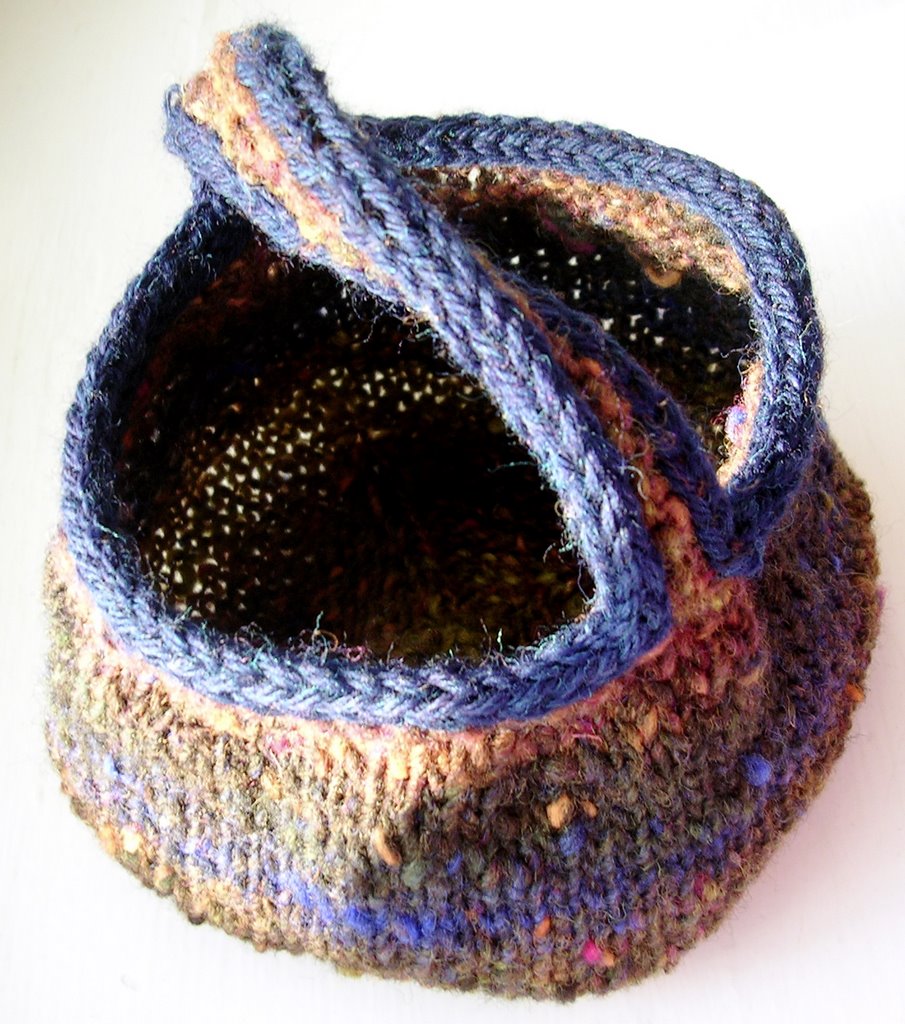
a moebius basket
MATERIALS: Noro and Cascade 220 oddments
NEEDLES: Size US6 dp and circular needles
PATTERN: extrapolated from the patterns for Moebius boots in Cat Bordhi's A Treasury of Magical Knitting
NOTES: The Moebius cast on is easier than it looks and that the basket has no inside or outside was completely entrancing to a seven year old boy who thought he didn't care about having an Easter basket this year.
25 June 2006
gold

the hourglass sweater
MATERIALS: three 8oz hanks of Henry's Attic Texas Bighorn wool and mohair blend dyed with brazilwood and cutch by the handwork teacher at my son's school
TOOLS: size US6 dp and circular needles, yarn needle
PATTERN: Joelle Hoverson's design from Last Minute Knitted Gifts tweaked for this thicker yarn with a cable down each sleeve from Leslie Stanfield's The New Knitting Stitch Library
NOTES: Texas Bighorn is a great yarn for dyeing because the mohair and wool take the dye differently. The mohair almost glows dyed gold, but there's a lot of it in the yarn, so this will be a sweater I wear outdoors. I worked afterthought hems and put phoney seams down the sides of the bodice and sleeves.
24 June 2006
ojos


What else could I do with all that leftover dishcloth yarn?
snufkin
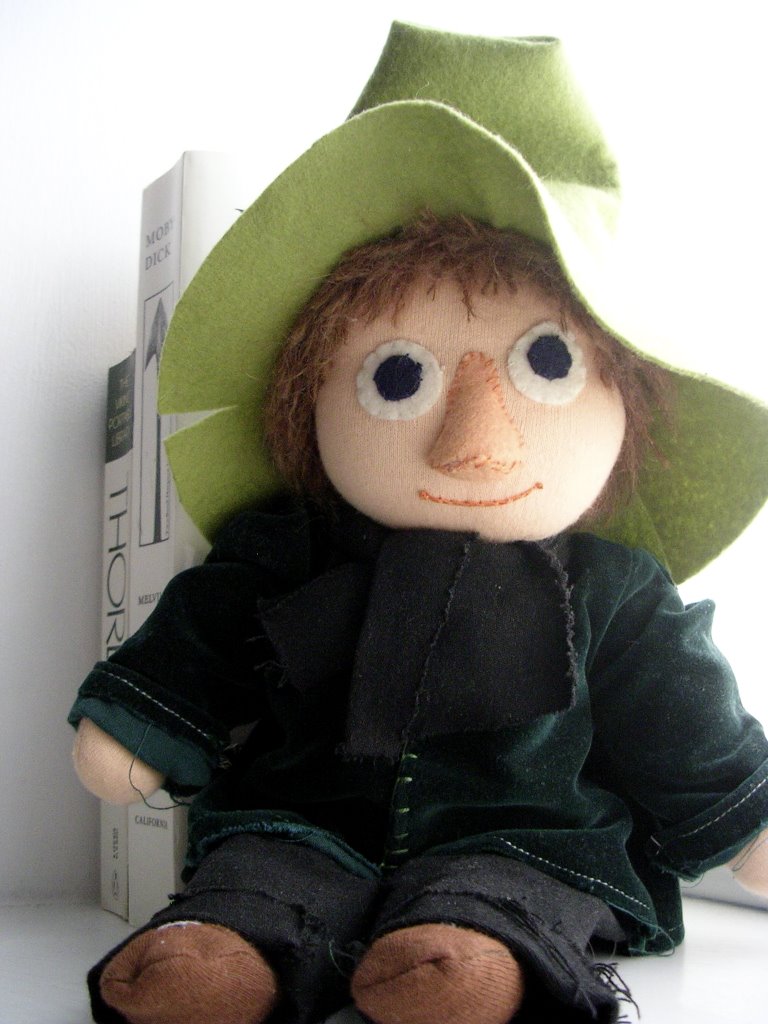
a doll of the character Snufkin from Tove Jansson's Moomin books
MATERIALS: a 16" doll kit from magiccabin.com and Holland felt for the hat, yarn, wool stuffing and fabric from achildsdream.com
TOOLS: needle and matching thread
HOW: followed instructions in the kit to make the doll's body and adapted the features of the face to make him resemble Snufkin
23 June 2006
raffle

an afghan made with squares knit by fellow parents and dyed and pieced by me to be raffled off to benefit our children's school
MATERIALS: Henry's Attic Texas Bighorn yarn, Earthues madder, cochineal, cutch, osage orange and logwood gray extracts (packaged in a Botanical Shades kit with instructions and enough extract to dye 10lbs of fiber)
PATTERN: various textured squares from Barbara Walker's Learn to Knit Afghan Book assembled using Three Needle Bind Off and bordered with "Courthouse Steps" log cabin strips
NOTE: Extracts eliminate the need to steep your own dyestuffs and may produce more predictable results than dried and fresh plants, but I think they make the process seem abstract and therefore less engaging. I would use them again for dyeing a high volume of fiber, but I wouldn't want anyone who considers experimenting with natural dyes to miss out on crushing her own cochineal bugs.
twiggy
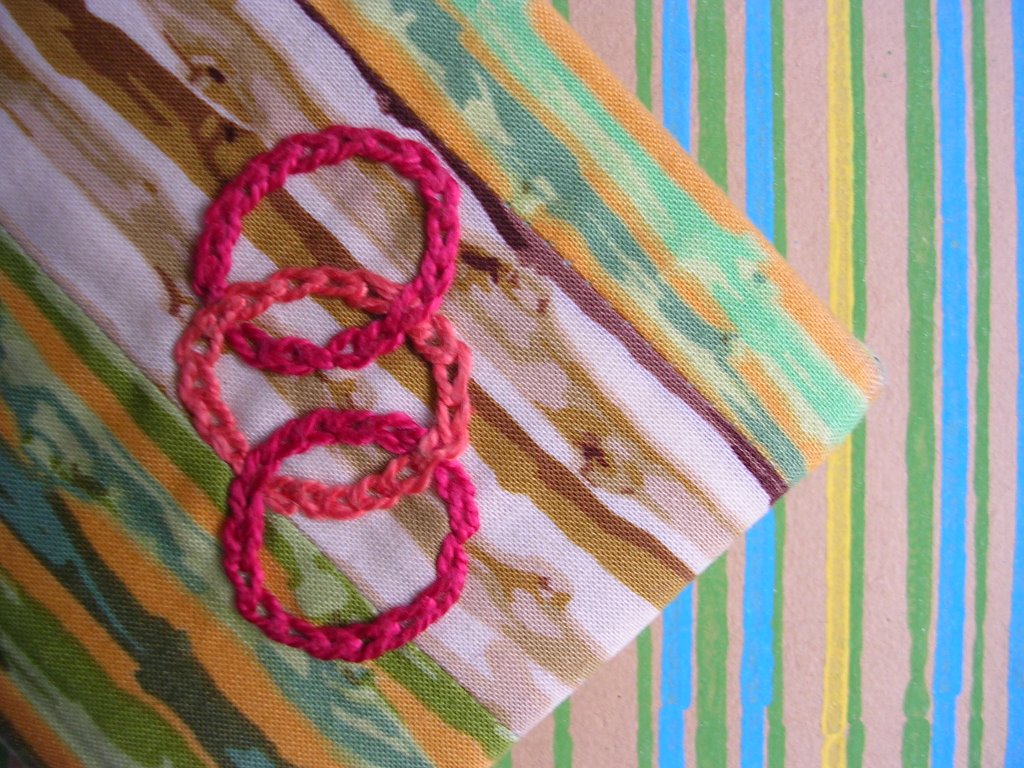
a fabric covered, embroidery embellished datebook
MATERIALS: Martha Negley "twig stripe" fabric, light fusible interfacing, text block and book board kit from paper-source.com, PVA glue, DMC perle cotton
TOOLS: glue brush, bone folder, triangle, embroidery needle, the www for instructions on covering books, sewing machine
INSPIRATION: Japanese embroidery book seen first at yarnstorm.com (ISBN 4-579-11032-3) for the interlocking circles motif
HOW: 1. machine pieced the fabric and then backed with interfacing 2. decorated with embroidery (or with mini log cabin patch as I did for Kay's datebook that I didn't take a picture of before sending off) 3. covered the book
22 June 2006
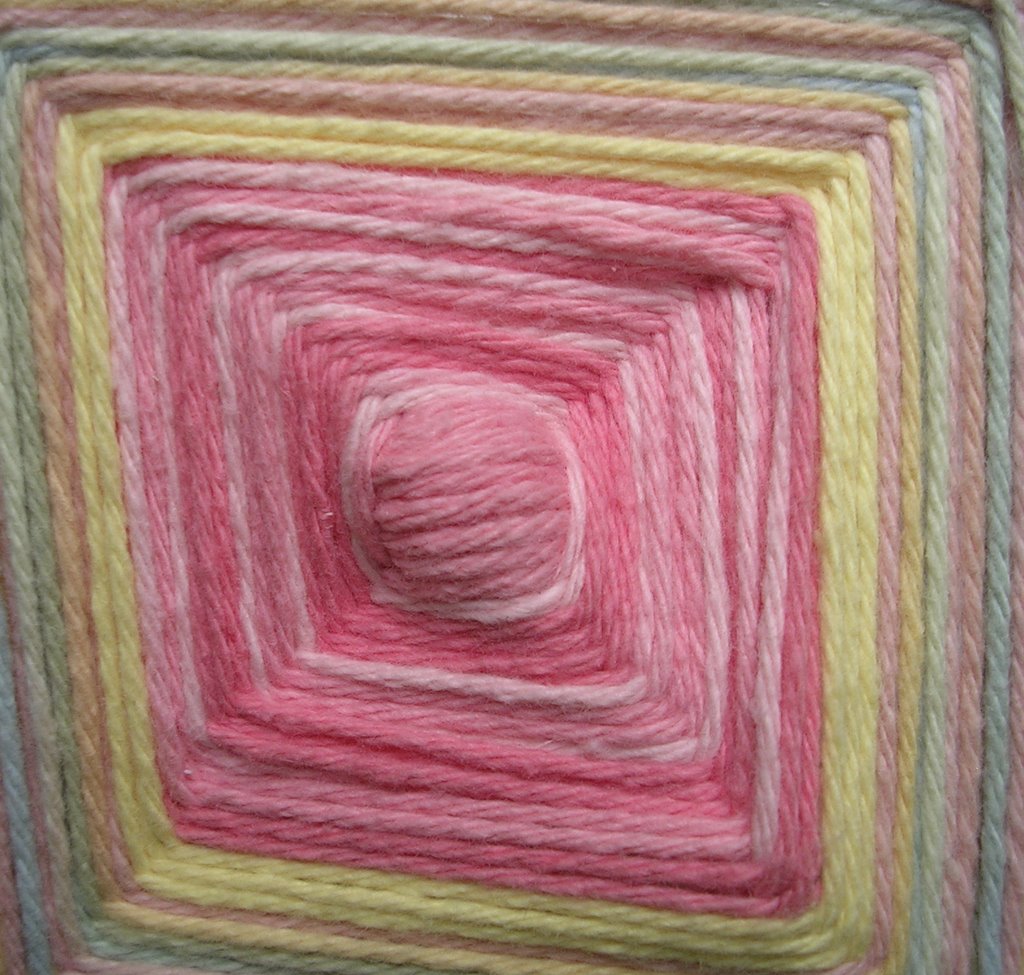
coral

the wool steeping in madder root and cochineal "tea"

the finished yarn
MATERIALS: 8 oz. of wool yarn (I used Henry's Attic Pony 2 ply), 1/4 oz. cochineal, 4 oz. madder root, 2oz. alum mordant (dyestuff available from earthguild.com or aurorasilk.com)
TOOLS: one or two inexpensive stainless steel or enamel coated aluminum pots big enough to hold the yarn and water to cover by several inches that you will devote to dyeing, a plastic or stainless steel spoon for stirring and lifting yarn out of the baths that you will devote to dyeing, rubber gloves, a candy thermometer is optional if you want to check that the yarn stays below 200 degrees F, but if you keep the solutions at a bare simmer for mordanting and dyeing, the yarn will not full and the dye will take
HOW: First, if the yarn is unscoured, you must wet it thoroughly in tepid water by letting it soak for a good ten minutes and swish it with some gentle shampoo to remove excess oils and any sizing. Rinse the yarn thoroughly and make sure it is tyed loosely but with good knots in several places. Mordanting the wool and extracting the dye can take place side by side on your stove if you have two pots to devote to dyeing. If you have only one pot to work with, mordant the wool first and then extract the dye; the mordanted wool can be stored in a plastic bag until the dye is ready, but no more than a week or it may start to get moldy. Dissolve the mordant in hot water in the pot. When the mordant is dissolved fill the pot 2/3 full and then add the wetted wool. Swirl the wool gently and turn on the heat to medium. You want the solution to reach a bare simmer in about 45 minutes--swirl it in the solution occasionally. Then you want to keep the yarn at the bare simmer for another 45 minutes, swirling occasionally; off the heat, cover the pot and leave the solution and yarn to cool to room temperature overnight. Drain the wool and rinse it, squeezing out excess water gently. To extract the dye, crush the cochineal in a mortar or use a plastic bag and something flat and heavy to get the bugs down to a powder. Add the cochineal and the madder roots to a pot and cover with water by a few inches. Bring the madder cochineal solution to a boil and keep the heat on it for 45 minutes to an hour. Off the heat and let the dyestuff steep overnight, covered. When the extract is ready and the wool has been mordanted, you're ready to dye. Add as much water to the pot of dye extract as you'll need to cover the wool. You can adjust the water level if it's too low once the yarn is in the pot, but don't pour off any solution.* Lower the wool into the dye bath and bring the solution and wool to a bare simmer in 45 minutes, swirling occasionally and leave to simmer for another 45 minutes, swirling occasionally. Off the heat, cover the pot and leave the wool to steep overnight. In the morning use the gloves to lift the wool out by hand and rinse thoroughly and repeatedly until the run-off water is nearly clear. You can spin dry the wool in your washing machine before hanging it to dry. The "exhausted" dye bath is still potent enough to get another 8 oz of wool a light shade of salmon pink. Plan ahead by mordanting a second 8 oz skein of the same or a different wool along with the hank you want to turn coral. (I wish I had a photo of the mohair blend I dyed in the exhaust bath--salmon mousse.)
*The proportion of yarn to dyestuff is important, but the amount of water is not. Dye particles are distributed throughout the solution and will attach themselves to however much wool is in the pot as long as they have enough water to move around the wool.
NOTES: The dye will come off of countertops and ceramic sinks quite easily with a little soap and water or a light bleach solution, but cover countertops before you begin dyeing if you'd like to avoid temporary staining. Wear an apron while you work to prevent clothes from getting stained. If you prefer directions in a list format, the tutorial at aurorasilk.com differs a little in particulars from mine, but will get the job done. Natural dyeing is definitely not an exact science. Having said that, I recommend Gwen Fereday's book Natural Dyeing. From only five dyestuffs she has developed proportions and blends and gives overdyeing directions to create hundreds of colors with shades of each for wool, silk, and cotton.
![]()
