
29 September 2006
duvet
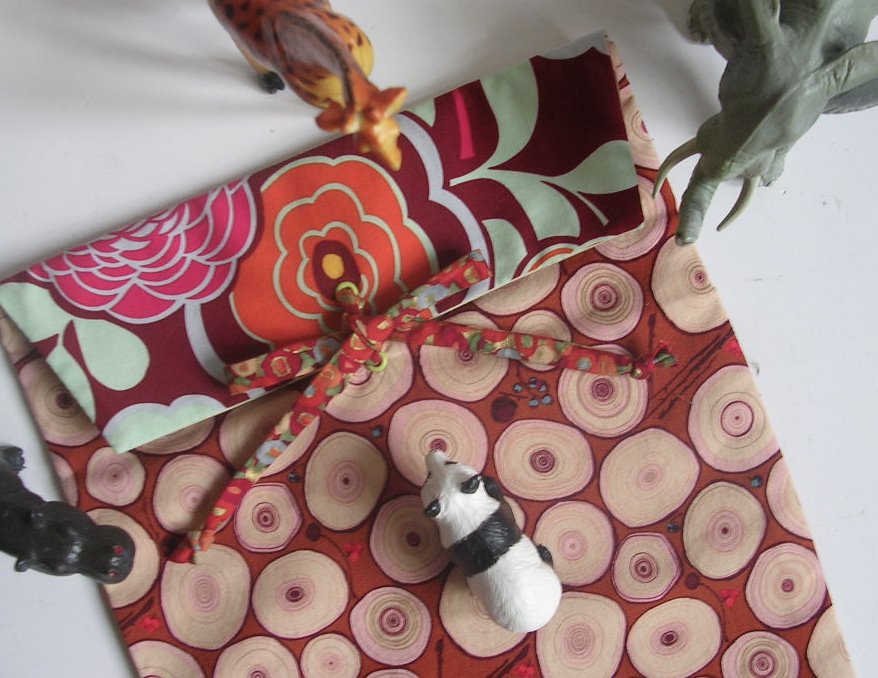
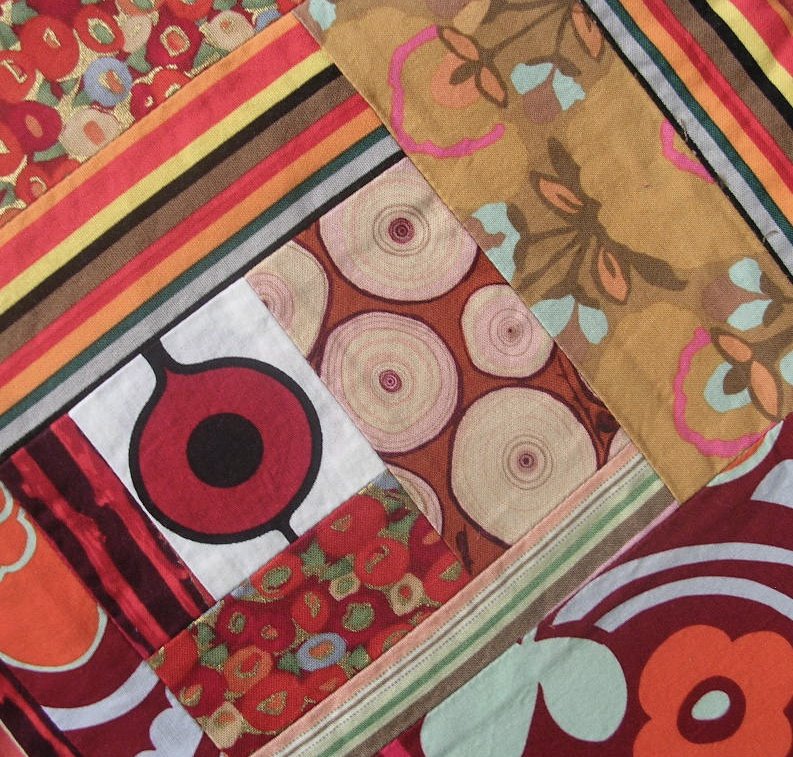 a large fabric envelope
The pattern is Amy Butler's from In Stitches. The back panel is a big log cabin patch with one "bead" from a piece of abacus fabric as its focus. As with the photo file I made earlier this week, I chose not to use the cardboard panel insert. Instead, I backed the log cabin patch with fusible interfacing and left a gap when I stitched the whole thing together through which I turned the piece right side out. Next time I make this, I will back the front panel with interfacing, too. Another beautifully explained pattern from In Stitches. I think my sewing is getting better.
28 September 2006
bobbing
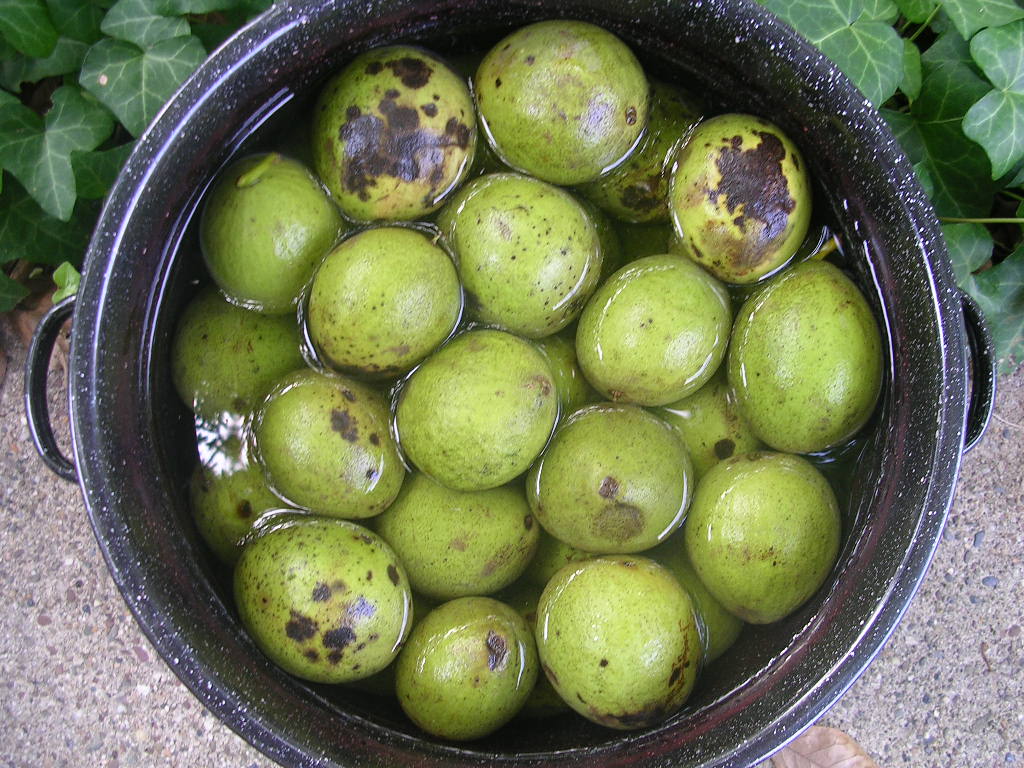 black walnut husks soaking in water
I collected these from the ground around a tree on the campus of my son's school. Following Jenny Dean's instructions in Wild Color, I covered the husks with water in a pot where they will sit for at least 24 hours before I simmer them to extract their dye. Whatever I can get my hands on to dye shades of brown will go into the pot over the next week.
26 September 2006
happy
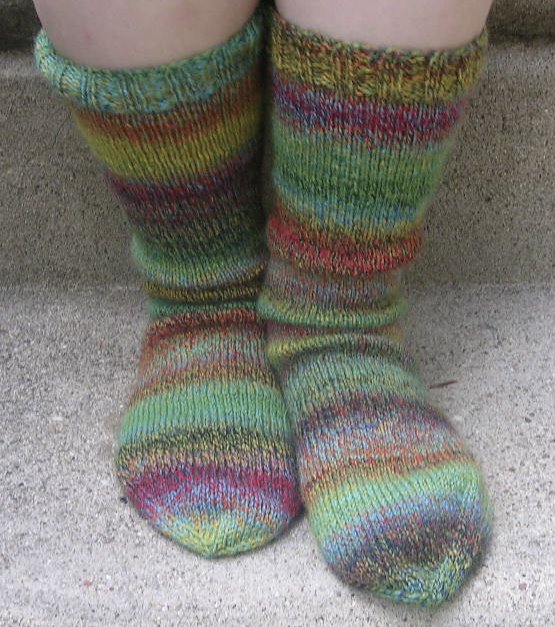 socks for Bruno
This is Trekking XXL in the ubiquitous #100 colorway. I echo everything everyone else says about how fun it is to knit with this yarn and plan to do this with the other skein of Trekking in my stash.
25 September 2006
file
a fabric envelope for photos

This is the Photo File from Amy Butler's new book In Stitches. The directions are great. I tweaked them to skip the step for inserting cardboard. Instead I left a two inch opening when I stitched the file all around, turned it through that opening and blind stitched the gap closed after pressing. It took an hour to make. I used scrapbooking eyelets and no, that wasn't a good idea. They look cute from the outside, but they weren't made to go through two layers of fabric and a layer of Craft Fuse and will need to be replaced.

This is the Photo File from Amy Butler's new book In Stitches. The directions are great. I tweaked them to skip the step for inserting cardboard. Instead I left a two inch opening when I stitched the file all around, turned it through that opening and blind stitched the gap closed after pressing. It took an hour to make. I used scrapbooking eyelets and no, that wasn't a good idea. They look cute from the outside, but they weren't made to go through two layers of fabric and a layer of Craft Fuse and will need to be replaced.
22 September 2006
o
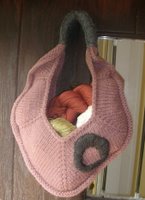
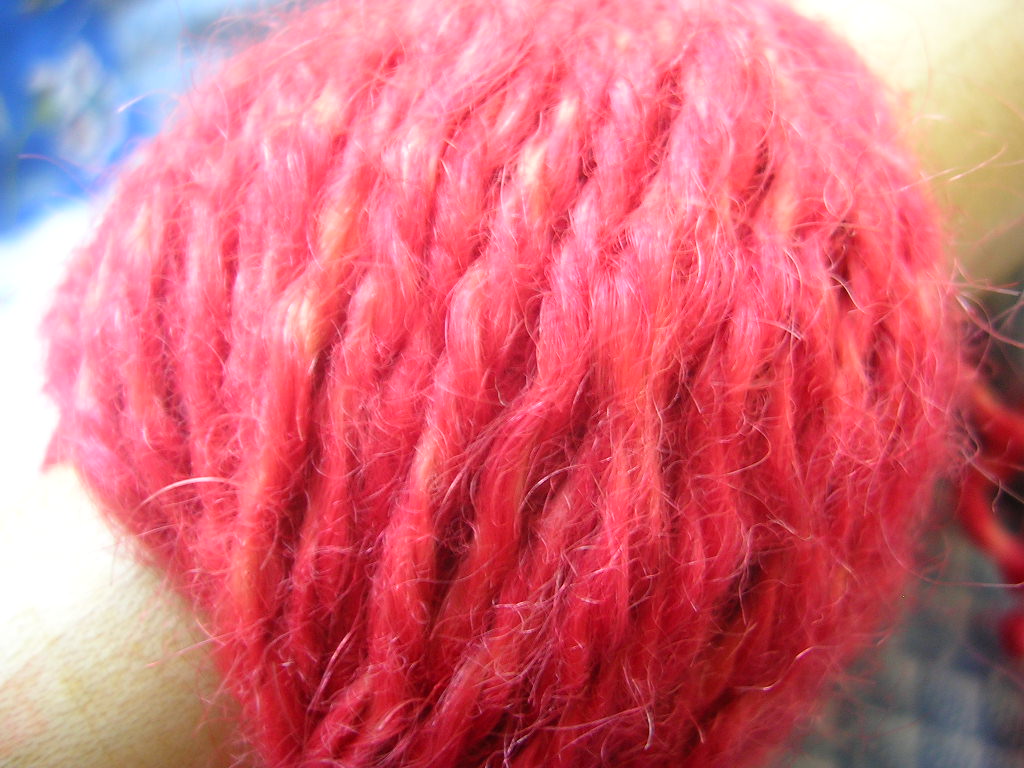
a version of Teva Durham's Octagon bag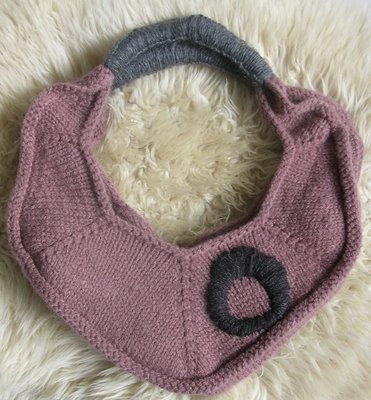 MATERIALS: six 50g (95yds) hanks of Classic Elite Tapestry (a now discontinued worsted weight mohair and wool blend) in Botany Pink, fingering weight charcoal alpaca for the embroidered circle and almost one quarter of a skein of Lamb's Pride Worsted in Charcoal Heather to wrap the handles--all the yarns were worked doubled
PATTERN: I tweaked the pattern published in Interweave Knits Summer 2003 to suit the yarn I substituted for Fiesta's Kokopelli. I cast on 72 stitches for each side and 114 for the gusset, but worked the short rows and rounds as directed in the pattern. The same bag appears in the designer's book Loop-d-Loop, but I haven't compared the patterns.
NOTES: The handles kept curling even after felting and blocking, so I decided to wrap them. First I stitched them into a roll between the top two sections of the octagon. To wrap, I used Joelle Hoverson's directions (in Last Minute Knitted Gifts) for making a spiral corded tassel, but eased the knots into straight lines as I worked instead of letting them spiral.
 I made this bag for an exchange with my friend Cheryl. If she leaves it here long enough, I may feel inspired to line it, but I'm also thinking about whether to embellish it further. Beads or French Knots in the circle (like the squarish motifs in The New Crewel)? A button and i-cord closure?
 MATERIALS: six 50g (95yds) hanks of Classic Elite Tapestry (a now discontinued worsted weight mohair and wool blend) in Botany Pink, fingering weight charcoal alpaca for the embroidered circle and almost one quarter of a skein of Lamb's Pride Worsted in Charcoal Heather to wrap the handles--all the yarns were worked doubled
PATTERN: I tweaked the pattern published in Interweave Knits Summer 2003 to suit the yarn I substituted for Fiesta's Kokopelli. I cast on 72 stitches for each side and 114 for the gusset, but worked the short rows and rounds as directed in the pattern. The same bag appears in the designer's book Loop-d-Loop, but I haven't compared the patterns.
NOTES: The handles kept curling even after felting and blocking, so I decided to wrap them. First I stitched them into a roll between the top two sections of the octagon. To wrap, I used Joelle Hoverson's directions (in Last Minute Knitted Gifts) for making a spiral corded tassel, but eased the knots into straight lines as I worked instead of letting them spiral.
 I made this bag for an exchange with my friend Cheryl. If she leaves it here long enough, I may feel inspired to line it, but I'm also thinking about whether to embellish it further. Beads or French Knots in the circle (like the squarish motifs in The New Crewel)? A button and i-cord closure?
20 September 2006
sandra
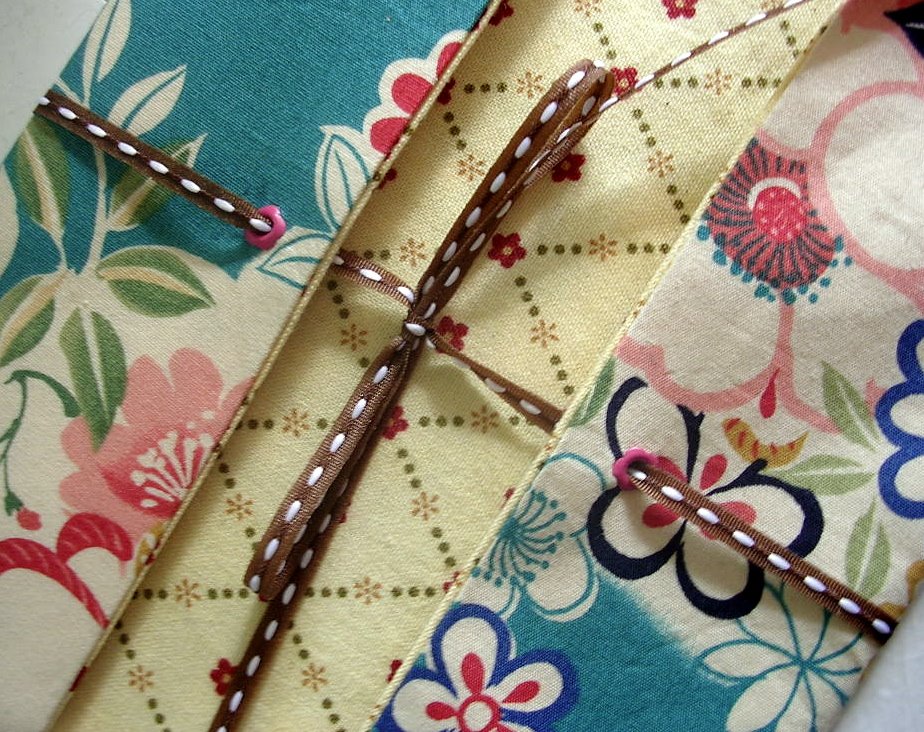
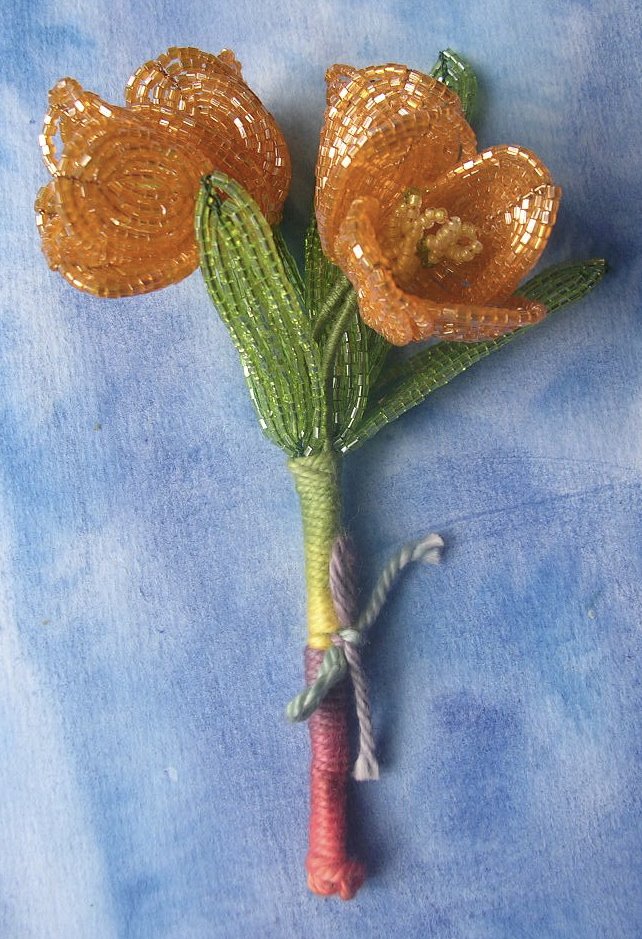 French beaded flowers
My sister in law Sandra is the most meticulous handcrafter I know. She has been making small posies of French beaded flowers for the past few years and develops her own methods to get the results she wants or to make flowers and leaves that aren't in any of the books she has on the topic. Here you see tulips and a close-up of an iris she gave to me.
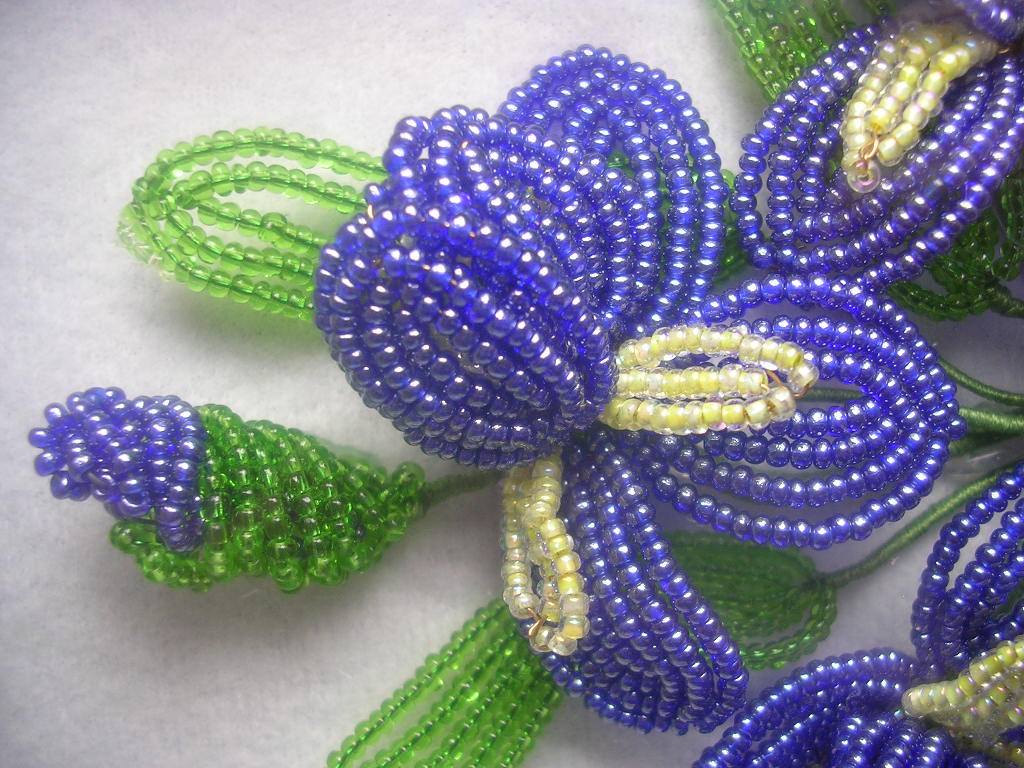 Sandra recommends The Art of French Beaded Flowers by Carol Benner Doelp for beginners to the craft.
Commenter Karen asked if Sandra accepts commissions and the answer is Yes! Write to me cbshiffman at yahoo dot com if you want to know more.
12 September 2006
boytoque
 a hat for Bruno
Whiplash Grade A Fancy. Within minutes of reading the September 1st announcement of this month's whip up whiplash theme, I had my plant-dyed alpaca (Cf. "plum", 7/10/06) in hand as I searched for size 2 dps. They were in an unfinished sock (Cf. "hiatus", 7/12/06). Now what? Rummage around for a tapestry needle and waste yarn and banish all that Trekking XXL to sock limbo? Or drag my toddler, my seven year old and his friend for a walk through the fringes of Hurricane Ernesto to the lys? At the moment of ordering everyone to put their rainboots on I layed eyes on size 2 single pointed needles. Dim memories surfaced of the Elizabeth Zimmerman Pothandler Baby Blanket I had knit for Bruno before he was born (Cf. The Knitter's Almanac). The design forming in my head had a brim made of one long tube. Knit a tube on two needles? It...could...work (Cf. Mel Brooks' Young Frankenstein)! I cast on 140 stitches and after two millennia I had this:
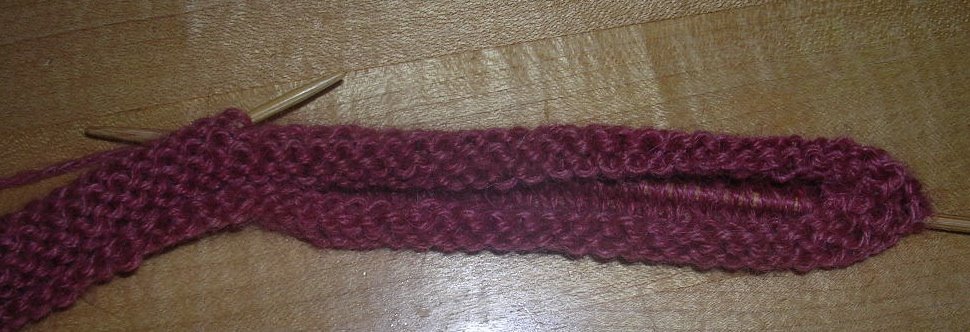 Okay, it only took half an hour, but all that slipping every other stitch on every row for ten inches of seven stitches per inch would take me far longer than two weeks. And I wanted to make the outer fold of the hat in an as-yet-unplotted openwork pattern. This project was supposed to be whip-uppity and I was feeling whipped.
 Then the rebound came. I had kid-friendly, machine-washable, DK-weight wool in the stash and nothing on my size 6 12" circular needles. Mammatoque was silenced (for now)....boytoque yelled,
 "Yay!"
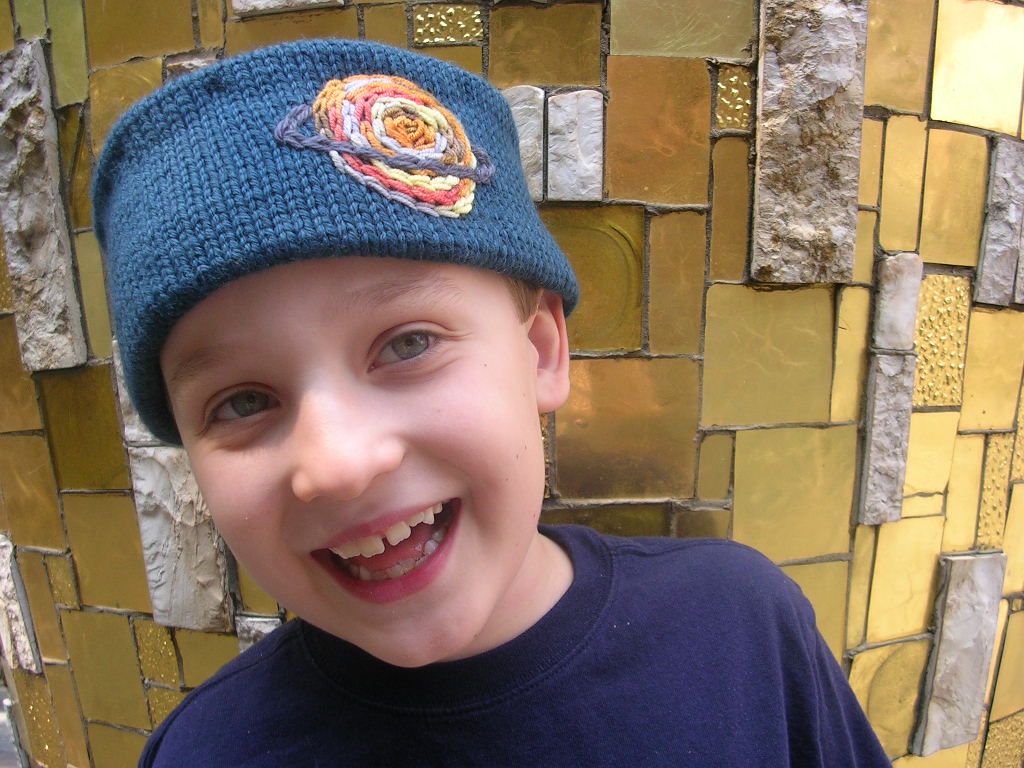
What follows is my pattern for the hat made with Mission Falls 1824 Wool that you see my son modeling in these pictures. You need only two measurements (the circumference of the head you want "to hat" and the height of the finished brim times two) and a gauge swatch to make the hat in any size and using whatever yarn you like. (Make your total stitch count a multiple of five if you plan to shape the crown with five "spokes" as I have in the pattern.)
MATERIALS: Two skeins of 1824 Wool in Teal (I had only a few yards left at the end, so if you're sizing up get an extra skein), a small amount of Art Yarns Ultramerino 4 (I couldn't find the shade I used on the Art Yarns color chart--it may be discontinued), a small amount of Knit Picks Merino Style in Pewter
TOOLS: size 6US 12" circular needle or dps OR SIZE TO OBTAIN GAUGE, tapestry needle
GAUGE: just like the ball band says, 18 stitches and 24 rows measured over 4 inches
MEASUREMENTS: The folded hat brim is about 22" around and almost four inches high.
PATTERN: Cast on 100 stitches using the long tail cast-on method and leave a more than usually generous tail. Join the stitches to work in the round and knit every round until the tube measures eight inches. Start the crown by purling one round, knitting one round and purling another round. Work a decrease round: *K 18, k2tog through the back loop (tbl), repeat from *. Purl one round. Work a decrease round: *K 17, k2tog tbl, repeat from *. Purl one round. Continue alternating decrease rounds and purl rounds as established until 60 stitches remain. Purl one round. Work a double decrease round: *K 8, k2tog tbl, k2tog tbl, repeat from *. Purl one round. Work a double decrease round: *K 6, k2tog tbl, k2tog tbl, repeat from *. Purl one round. Continue alternating double decrease rounds and purl rounds as established until ten stitches remain. Cut yarn and thread the end onto a tapestry needle. Draw the yarn through the ten stitches as you remove them from the needle and pull tight. Turn the hat inside out and sew in the end. Now thread the generous tail you left on the cast-on edge onto the tapestry needle. Fold the brim up so that the cast-on edge meets the first ridge of the garter stitch crown. Use a whip stitch (or your preferred method) to sew the edge firmly, but not tightly to the garter ridge. Leave the needle on the yarn. Turn the hat right side out. It now looks like this:
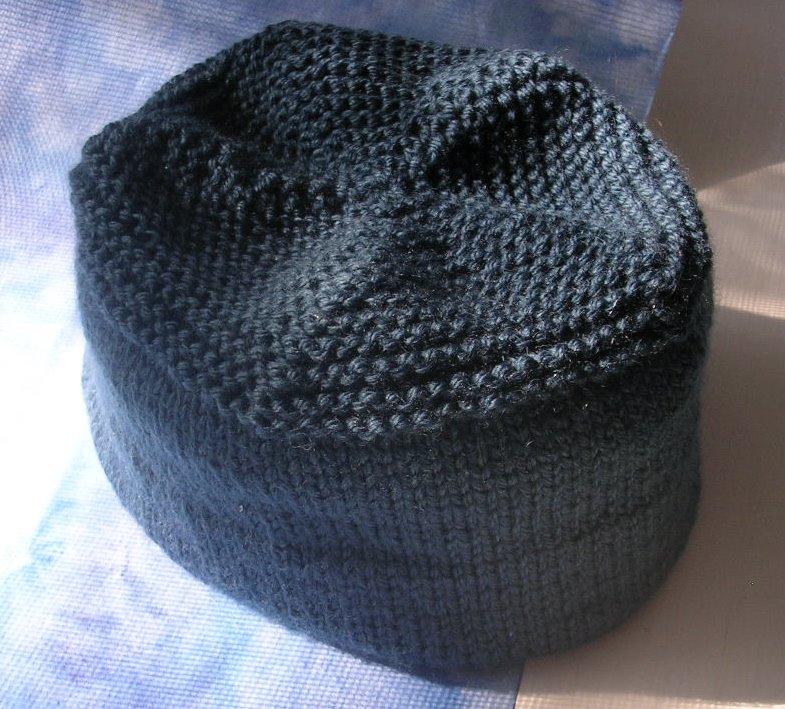 You (may--it's cute without the lip, too) want it to look like this:
 Pull at the brim to form a lip about 3/4" deep where the brim meets the crown. Using the still-threaded tail and small stitches placed about every inch along the hat brim, secure the lip to the edge of the crown:
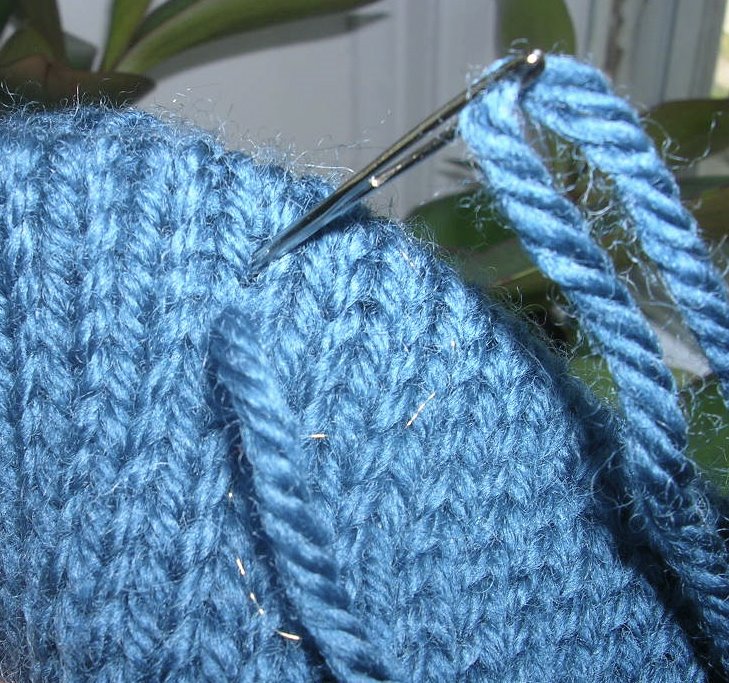 The stitches catch just one horizontal bar of yarn before going back through the brim and crown. Click on the photo for a close-up.
Sew in the end and give your completed hat a sturdy steam blocking. Now you're ready to embellish. Here's a close-up of the chain-stitched Saturn Bruno requested for his hat:
 It would have looked more realistic if I had zig-zagged the stitches instead of sewing in a circle, but I'm still waiting for the re-do impulse to whip me. However you embellish your boytoque, or wherever you take the basic pattern (pillowtoque in GGH Touch Me? babytoque with ear flaps? fully reversible doubletoque?), I'd love to see a photo in my box at cbshiffman at yahoo dot com or a link to your site. Toque to me. -Cristina

05 September 2006
elemental
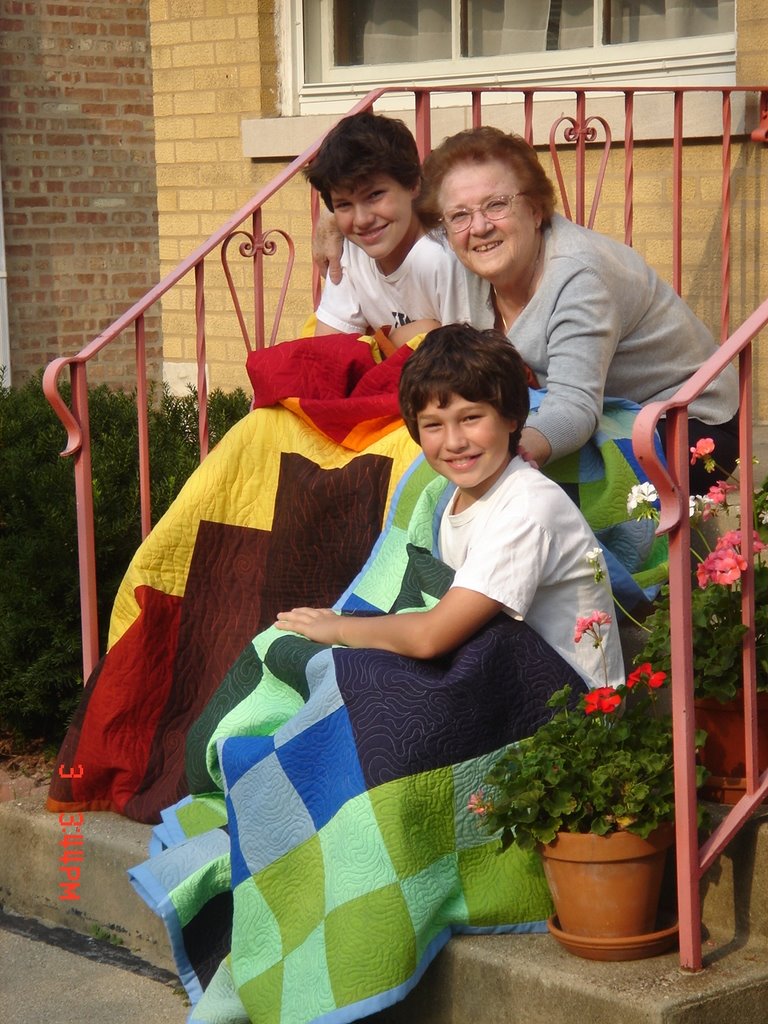

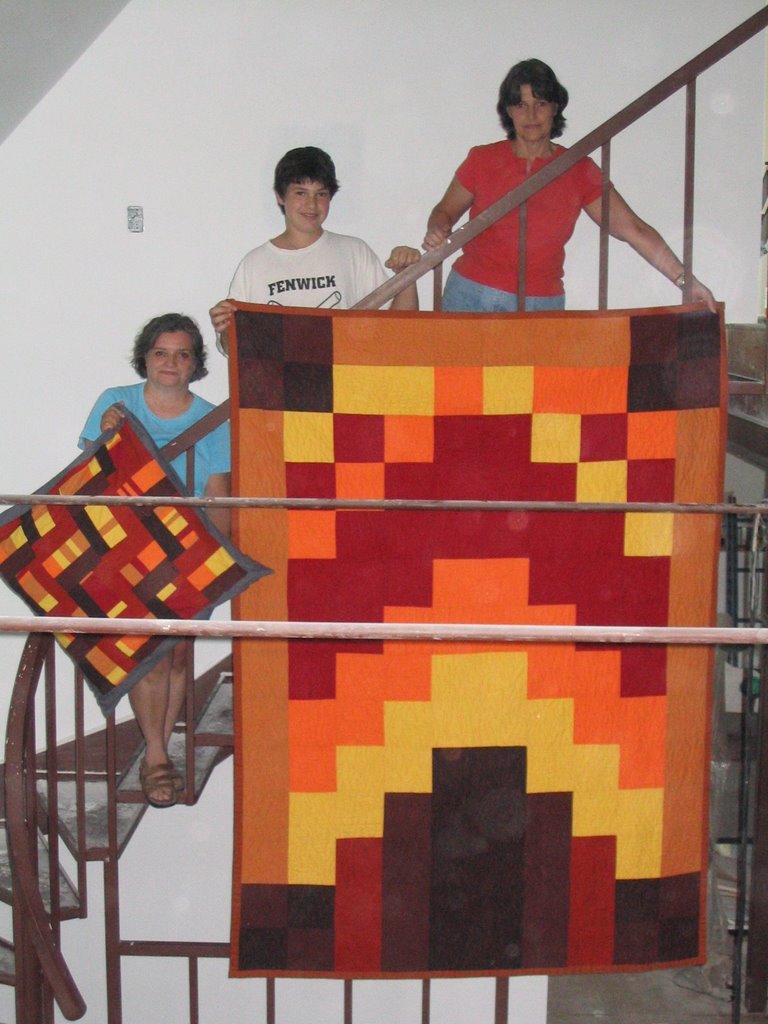
quilts designed by my nephews Raffi and Tony and pieced by me and my sisters Tonia, Margie, Amy and Sandra

"Six inch squares, in your choice of colors and however you want to place them." Those were the parameters set by my sister Tonia when she and her boys decided to make quilts for the boys' room. Raffi chose the earth and fire colors and Tony picked watery and airy blues and greens (trading temperaments). I made up pillows to go with the quilts and you see the completed works displayed in my brother Mario's house (a work in progress--and another family project, but that's material for another post).
04 September 2006
reworked
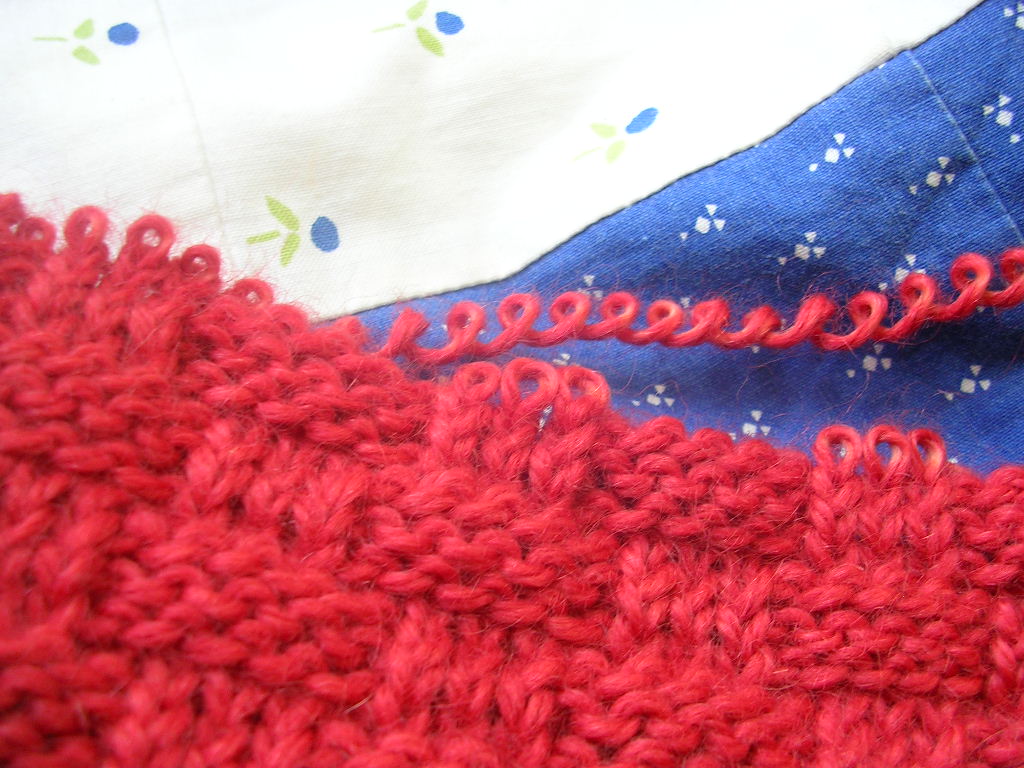
 recycled yarn from an afghan square dip-dyed in madder
The dye didn't penetrate the yarn evenly throughout the knitted square, so the unraveled yarn looks somewhat marled with its original off-white color.
![]()
